Showing posts with label Nail Polish. Show all posts

Monday, March 12, 2012

Popular Colors for Spring 2012

Every year, Pantone forecasts the year's most popular colors, these are the ten they have for this year.

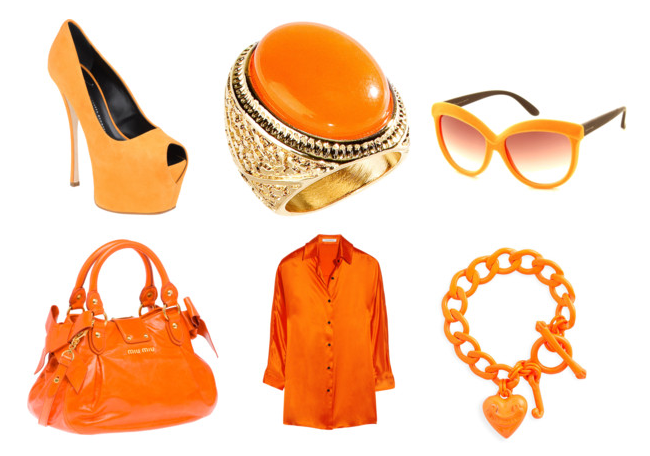
1. Tangerine Tango (Pantone Color 17-1463)
Have we posted a trend post yet without mentioning tangerine? I don't think so, tangerine (or "tangerine tango") is definitely and without a doubt the it-color for spring this year. Tangerine looks great as a pop of color for an outfit. Juicy Couture even has a charm bracelet in tangerine!

2. Solar Power (Pantone Color 13-0795)
Another bring hue for this spring is Solar Power, a bright yellow. This "solar yellow" demands someone's attention. Sometimes, yellow can be a little harsh, but worn in moderation and in the right way, it can brighten up your wardrobe for this spring.


3. Bellflower (Pantone Color 18-3628)
Purple looks beautiful in the spring. It compliments the beautiful spring flowers wonderfully. This lavender/violet looks gorgeous as a dress, shirt, or just an accessory.


4. Cabaret (Pantone Color 18-2140)
Cabaret is a gorgeous mix of rose and violet. This color can be flowing and girly, or tight-fitting and mysterious. This color is very versatile and flattering. Try it in nail polish as well (it's one of spring's nail color trends) And I found another Juicy Couture charm bracelet!!


5. Sodalite Blue (Pantone Color 19-3953)
This dark blue is perfect for incorporating into a nautical-themed outfit. Dark colors are slimming, so it's flattering too! Navy goes with everything (like jeans) so it's easy to wear as well.


6. Margarita (Pantone Color 14-0116)
Margarita is a beautiful yellow-green. Green has been named the color of 2012 by many different sources. This green is soft and wearable, but unexpected as well.


7. Sweet Lilac (Pantone Color 14- 2808)
This lilac-toned pink is very romantic and girly. Wear it with girly pieces like dresses or skirts. Also, wear it on your nails for a natural pink flush.


8. Cockatoo (Pantone Color 14-5420)
Cockatoo is a whimsical light blue that can be incorporated into many different clothing styles. Try it with bohemian, girly, classic, or quirky outfits.


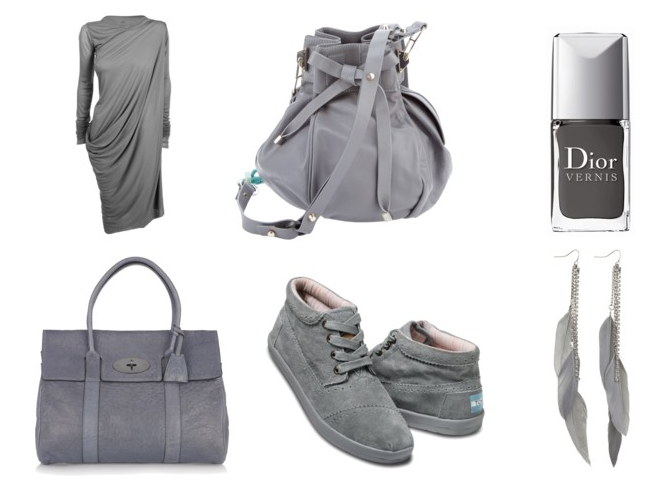
9. Driftwood (Pantone Color 18-1210)
Driftwood is a blend of grey and brown. Driftwood could look very modern and fashion forward when worn with pieces of that style, or casual and bohemian if worn with casual pieces. 

10. Starfish (Pantone Color 16-1120)
Starfish is a blend of sand, nude, and khaki colors. It is very natural and wearable for everyday. Wear it on your nails a well (Foundation nails are a 2012 spring nail trend).


In general, the colors to wear for spring 2012, a light, bright, or neutral. They are very wearable and you most likely have at least one of them in your closet already. -XOXO

Wednesday, March 7, 2012

How-To-Rock-It: Color Blocking

Color blocking has been in for a while now, but it still remains a hard look to pull off.
Designer: Gucci
To pull off color blocking there are a few things that you need to remember: less is more, opposing or complementary colors, little texture. and harsh lines.

To explain, when I say "less is more" I mean that color blocking tends to look better when there are only a few different colors.
Jessica Alba

When there are too many different colors in your outfit, it looks much too busy. Stick to only having three different colors. If you do not want to have a full color blocking outfit, you can have one piece that is "pre-color blocked":

From Lulus

Another hard thing to know is what colors to wear when you are color blocking. You do not want your colors to be clashing, but sometimes that look can work for you if it is done right.
The orange and blue are not quite opposites, but are far apart.

When choosing colors, you either want colors in the same family(ex. pink and red), or you want them to be farther apart (ex. orange and purple)


Monday, March 5, 2012

NOTD: Nicole by OPI Nicole...Spotted!

This spring, mixtures of glitters are going to be super popular, my nail of the day today goes perfectly with this trend!

Nicole by OPI Nicole... Spotted! Six Coats

Nicole... Spotted! has both medium sized hexagonal glitters and small shimmers. The base of this polish has a blue-green base. However, it is very sheer so you need a lot of coats, this time I used five coats, but another time I used seven. The glitters are yellow, green, and blue. I absolutely l-o-v-e this nail polish!


Wednesday, February 29, 2012

How To: Keep Nail Polish From Chipping


Every girl loves her nail polish, but it can be discouraging if your perfect nails that you spent an hour on, chip after one day. In this post, you will learn hot to prevent chipped nails for about at week!

1. Use a Top Coat and a Base Coat

Seche Vite Dry Fast Top Coat

Using a Top and and Base Coat before and after painting your nails is crucial if you want longer lasting nails. A base coat provides something for the nail polish to stick to and also keeps your nails from getting those unattractive yellow stains. A top coat seals in your nail polish and will add a beautiful shine. The topcoat will also keep your nail polish from rubbing off and getting all over the place. Some top coats are eye fast dry and will cut down on annoying drying time. If you don't want to buy a top and base coat, you can use just a clear nail polish, although it will not work as well it will work well enough.
Try (Top Coats): Seche Vite Dry Fast Top Coat, Sally Hansen No Chip Acrylic Top Coat
Try (Base Coats): Sally Hansen Insta-Grip Fast Dry Base Coat

2. Prep Your Nails
You need to remember to properly prep your nails before apply polish if you want them to stay chip free.
Step 1: Remove Nail Polish


DON'T PICK OF YOUR NAIL POLISH! Doing this can weaken your nails and make them more prone to breakage.
To remove your nail polish, you can either you are pure acetone nail polish remove or not. Pure acetone removers work faster, but acetone is bad for you. Up&Up has a nail polish remover that is only $0.97! It may not be the best in the world, but it gets the got done well.

There are many different kinds of this nail polish remover.

Step Two: Fix Peeling Nail Layers

Nail Layers that are Peeling

If the tips of your nails look like the middle finger in the picture above, they you have peeling nail layers. These blemishes on your nails make for uneven nail polish application and therefore chipping, so you need to smooth them out. Thankfully, this is very easy to do. Just take a nail file and buff the ridge until it is smoothed off.
Also, trim your nails to your desired length.

Step Three: Buff Nails

Block Nail Buffer

Many brands make block nail buffers that have different levels of abrasion on the different sizes to insure a prefect buff on your nails. However, if you do not feel like investing the dollar to get one, you can just lightly use a nail file. With either of the options, just buff your nails lightly to make them slightly rough.

Step Four: Remover Again!
It is important to use nail polish remover on your nails again right before you apply the nail polish to make sure that they are clean and ready for polish!

3. Thin Coats!
When painting your nails, remember that lots of thin coats of nail polish chip less than a few thick ones.

4. Seal the Tip
To completely seal in your nail polish and prevent chips, make sure to paint nail polish on the ends of your nails, because chipping takes place right at the tip. I usually cap my nails for the base coat, first coat of polish, not for the second coat, and then for the top coat. This can also be called "capping" your nail polish.


Gel Nails:
If you do not want any chance of chipping, you can try to use gel nails. Gel nails last about two week without any chips. You can get gel nails done at a nail salon or you can do them at home. Gel nails apply like a regular nail polish, but dry under a UV lamp so that they do not chip and do not having any drying time other than the time under the lamp. Gel nails are very expensive at a nail salon, and are cost a lot to get started at home, but after that you start saving money. There are lots of videos on YouTube about doing gel nails at home that you can watch if you are interested in learning more about them. For a starter kit with everything you need (even the UV lamp!) try at starter kit by SensatioNail.

The SensatioNail starter kit has enough products for 10 manicures,  $60 at CVS

You can also buy individual gel nail polishes. Another gel nail polish brand (that does not have a starter kit that I know of) is Gelish.

If you are not interested in buying all of the different colors of nail polish to have gel nails, you can use Seche Ultra-V.


This topcoat can go over regular nail polishes and then is set under a UV lamp to prevent chipping.